The fitting of an undermount kitchen sink to a solid surface worktop such as corian or granite can be very involved and something that really needs to be completed by a specialist installer. Fixing clips have to be used and the worktop drilled from the underneath. On installations where a stainless steel sink is being used, the lightweight nature of the product doesn’t create a particular problem. However, when using a heavy, bulky undermount ceramic kitchen sink, the small clips become somewhat inadequate!
So what alternative ways are there to fit a heavy granite or ceramic kitchen sink?
In this help section, we explain an easier way to fit your undermount kitchen sink, without having to drill or plug the solid surface worktop. Although this method is particularly useful for ceramic or granite sinks, there is no reason why you cannot use the same installation method for a stainless steel sink.
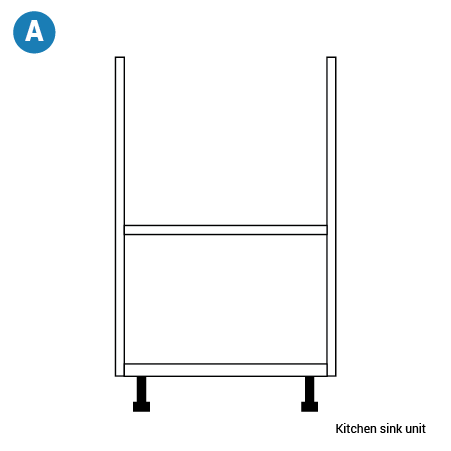
Firstly, the ideal unit to start with is a specific kitchen sink unit, rather than a simple base unit. If you are using a standard kitchen cabinet, you may need to remove the front bracing bar (don’t worry, as the next step will reinforce the strength of the cabinet). Diagram A

You now need to create a support shelf for the ceramic sink to sit into. All sinks, even under mounted models, will have a lip around the outside. You should fit the top shelf between the two sides of the unit and set it below the top edge of the side, the exact thickness of the sink. In other words, if the sink lip/thickness is 20mm then set the top of the shelf 20mm below the top height of the kitchen unit.
Before you actually fix the shelf in place, it’s a good idea to sit the sink upside down on the shelf and use as a template to draw around. If the sink you have purchased has a template included, you can use this instead. Don’t forget to make the required adjustments to the size and shape of the cut-out as you are cutting inside the outer edge of the external dimension of the sink. This will allow you to drop the sink into the hole you have cut, without it falling all the way through!
For the shelf, we recommend using a marine ply. If you are using a double or larger heavier ceramic sink, for example in an 800mm unit, then we recommend you upgrade the shelf material to a much thicker and stronger marine ply panel - maybe a thickness of 25mm.
Once you have cut the panel, you should then fix it into the sink base unit with just 2 screws either side (you will add more later). The easiest way to secure is to use appropriate size screws through the side panels. Diagram B
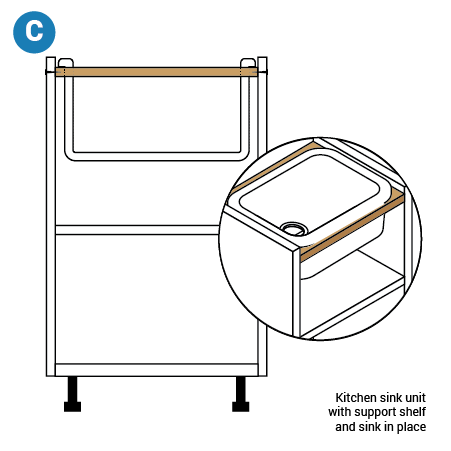
Once in place, ensure the panel is level and square. You should also dry fit the sink into the panel and rest a spirit level or straight edge across the sink unit to ensure it sits level. The top of the sink should not stop the straight edge from resting on the sink unit gable ends. If it does, you should unscrew the panel, lower by 1-2mm and refit. Once you are happy the panel is in the perfect position, you should then add additional screws to increase the strength of the panel. Diagram C
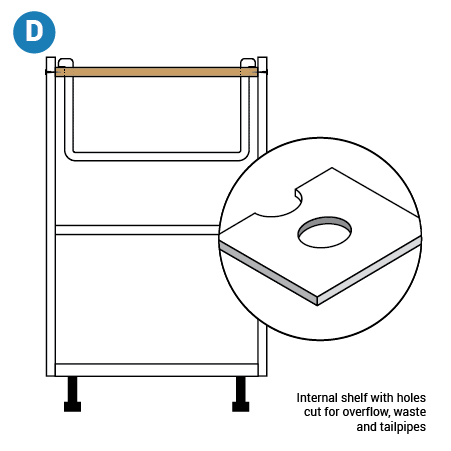
For added strength, we recommend you then take the internal shelf from the base unit and use as a bottom support panel. You will need to cut a large hole for the sink waste to be connected. You will also need to cut a section from the back centre so the tap tailpipes and any overflow can be connected or accessed. Diagram D
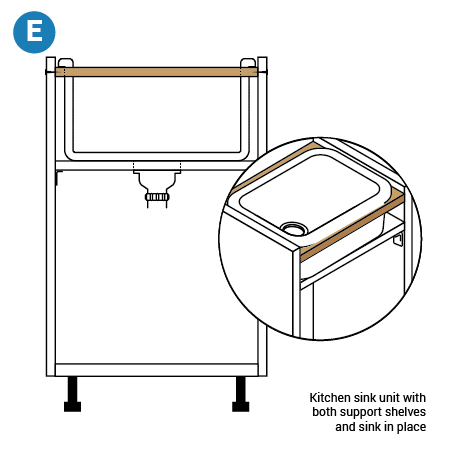
As this panel may need to be removed at a later date for access to the sink waste, the overflow or to change the tap, we recommend you DO NOT fix this shelf in with screws from the side. Instead, offer the panel up to the underside of the sink and fix in position with some L-shaped metal brackets or by using a long thin batten, fixed to the side of the cabinet. It is important for the bottom shelf to be touching the base of the sink, as this will provide additional support and strength to the sink (you can also use either side of the shelf as a handy place for storage). Diagram E
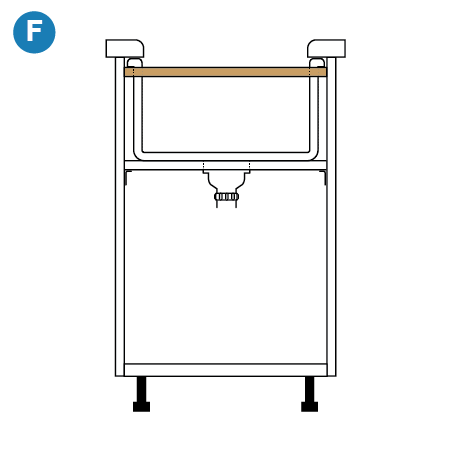
Once everything is in place and fixed securely, apply a small bead of silicone sealant to the top edge of the sink so, when the worktops are lowered into position, a watertight seal is created. Diagram F
Please note this is an alternative method of fixing a heavy kitchen sink in place when using a solid surface worktop. It is the responsibility of the installer to ensure this method is suitable for your particular installation. Some situations will require an alternative method or for you to follow the manufacturer’s guidelines without variation.